Setting up the Raspberry Pi as the master of my LAN
NB! all code produced by "Google-copy-paste-test-Google-fix-pray-save" - details not often understood.
But it does the job for me - do not use to run a lift. . . . .
Objective
Build web pages that control hardware on my house and garden LAN
- learn to control and measure with ESP8266 devices with and without linked Arduinos
(build a timed watering system under the control of the Raspi)
Method
Google for working code then learn how it works and customise it.
Evaluate the application of aREST with my own scripts in order to build a LAN control web page to my own design
(rather than use the simple 2 button pages that several sites offer)
Build on my earlier work using OpenWrt linux on router boxes .
Links
Open Home Automation
aREST
First prepare the Raspberry Pi
I need a ramdisk for changing data so as to not burn out the flash memory
Place this with 755 permissions into
/etc/init.d/graham_startup.sh
Every time the Raspberry Pi is booted the temporary RAM disk will be created - 2M means 2 Mega Bytes
it could be much larger - I use it for the output of bash scripts and the input of Blassic basic programs.
(Blassic basic acts as great glue to hold together other software including C, bash etc and can save and read files as needed.
It handles and manipulates text string in ways I can understand and remember
- (unlike C !!!!).
Learn Python and C++ if you can but if you only program a couple of times a year consider Blassic as a tool to get the job done.
See a few notes at pull down menu item 12 at -> http://www.sunspot.co.uk/Projects/sweexproject.htm )
#! /bin/sh # Now carry out specific functions when asked to by the system # make a ramdisk to save the flash ;; exit 0 |
and set a fixed web address for the Raspi at /etc/network/interfaces -
# The loopback network interface - always needed here # this one for dhcp # this one for WIFI D-Link DWL-G122 # The primary network interface - use this for ethernet cable if WIFI above not used # set these for the LAN address # set this for the Internet modem gateway to the LAN # my gateway acts as a local dns-nameserver
|
Setting up the Pi as a webserver
Get the latest software and links
apt-get update
install Apache
apt-get install apache2
There should be a simple webpage index.html in /var/www/
see it at http://192.168.0.82
CGI scripting in bash
in :-
/usr/lib/cgi-bin/hello.cgi
put :-
#!/bin/bash
echo -e "Content-type: text/html\n\n"
echo "<h1>Hello World</h1>"
then create a link to cgi-bin in the www folder :-
ln -s /usr/lib/cgi.bin /var/www/cgi-bin
see it at http://192.168.0.82/cgi-bin/hello.cgi
Add PHP
sudo apt-get install php5 libapache2-mod-php5 -y
To test PHP put into /var/www/php_test.php
<html>
<head>
<title>PHP test</title>
</head>
<body>
<?php
echo "<b>Hello World!</b><BR><BR>The date is ";
echo date('Y-m-d'), "<BR>and the time is ", date('H:i:s');
echo "<BR><BR>Now for some information about PHP :-<BR><BR>", phpinfo();
?>
</body>
</html>
see it at http://192.168.0.82/php_test.php
Building a custom webpage to control the ESP8266
Using a set of bash scripts to generate the webpage
Some years ago I added OpenWrt Linux to a Sweex router - the following codes are adapted from the code that came with the Sweex.
The webpage is created by calling http://192.168.0.80/cgi-bin/esp_control/esp_control.cgi from a remote browser.
The folder /var/www/cgi-bin is actually a shortcut to /usr/lib/cgi-bin as required by apache2 that comes with the Raspian (Debian) image for the Pi (see above)
Google for "setup cgi scripting Apache2 Raspian".
e.g. see http://raspberrywebserver.com/cgiscripting/writing-cgi-scripts-on-a-raspberry-pi.html
esp_control.cgi
#!/bin/bash #Decode query string IFS="&" # has the variable page been given a value? # if not then show the default text echo "Content-type: text/html" echo "<!-- Content goes here -->" #you can add shell command line commands here such as- # now finish the html |
When first run the cgi script first outputs -
/var/www/cgi-bin/esp_control/esp_page-top.html
<html> <title>ESP8266 Control.html</title> <a href="esp_control.cgi?page=esp_on&string=2">turn pin 2 on</a><br> <HR> |
followed by the default bottom of the page created by
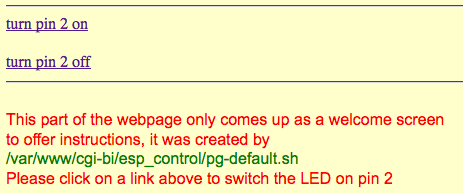
/var/www/cgi-bin/esp_control/pg-default.sh
#!/bin/bash #Generate the message that is first seen echo "<BR><font color=red size=3 face=Arial>" |
The web page looks like -
Clicking on a link makes the cgi script run -
/var/www/cgi-bin/esp_control/pg-esp_off.sh
#!/bin/bash # file location -> /var/www/cgi-bin/esp_control/pg-esp_off.sh # use > to replace file , >> to append to a file # make pin 2 an output # save the output to the ramdisk |
or -
/var/www/cgi-bin/esp_control/pg-esp_on.sh
#!/bin/bash # file location -> /var/www/cgi-bin/esp_control/pg-esp_on.sh # use > to replace file , >> to append to a file # make pin 2 an output # save the output to the ramdisk |
// Relay control using the ESP8266 WiFi chip // Import required libraries #include <aREST.h> // Create aREST instance // WiFi parameters // The port to listen for incoming TCP connections // Create an instance of the server void loop() { |
I have trusty set of bash scripts that I adapt to make web pages that control my LAN devices.
They were adapted for the above and
are here for backup.
They can be placed in /var/www/cgi-bin/xxxxx/ as a demonstration of adding a Blassic program to this process.
See them in use by adapting http://192.168.0.80/xxxxx/xxxxx.cgi for your LAN.
Please email
me if you want to swap notes
- especially if you do a better job !!!!
and/or
add i2c port expanders, thermometers, displays etc
(my next learning exercise)
more to come . . .