Sunspot Home

more notes for a bad memory - - -

Using an Arduino Mega with colour LCD (UTFT) display as an i2c Raspberry Pi slave

Objective
Use an Arduino Mega to drive an LCD display as the i2c slave of a Raspberry Pi i2c master.
Display temperatures from three thermistors attached to an Arduino Nano also as i2c slave to the same Raspberry Pi

ALSO SEE THIS

This display is from Banggood

3.2 Inch 320 X 480 TFT LCD Display Module (£5.99)

lcd
It runs the code from here but is not supported by the author of the UTFT library
(but make him a donation anyway!)

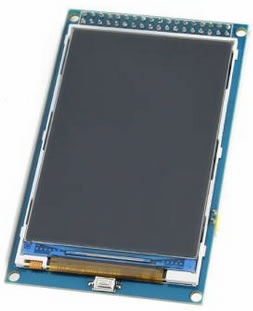
It is cheap bright and colourful and seems to have all it's pixels working.

This is a backup of my first working demonstrator - the first code to (at last!) do most of what I wanted
- (C code string handling is impossible to understand or remember if you only code twice a year! - Blassic rules!)
NB!!!!!!
This is "Lesson 1 C code" (Google-copy-modify-pray-test-fix-Google - run?)
It is saved here to back up my versions that run even if not finished - better versions may replace these at random times.

The system
A Raspberry Pi Zero is in charge of an i2c bus.
An
Arduino Nano hosts 3 thermisters on analog lines 0, 1 and 2 and acts as an i2c slave at address 4.
An
Arduino Mega with the LCD above acts as an i2c slave at address 5.

The Pi runs a Blassic basic "glue script" that first calls the C code program -
pi_drive_arduino__3_Thermisters1.bas

This talks to for-Pi-from-Nano_6_bytes_for_3_thermisters.ino
The Pi saves bytes from the Nano in it's ramdisk (to save the flash memory)

The Blassic script reads from ramdisk and sends the bytes on to the Mega by running the C code -
Pi-Ard_send_7_bytes_to_MegaLCD_get_4-a.c

Arduino Nano code (i2c slave) - send thermistor data to Raspberry Pi
(the NeoPixel code and potentiometer reading code is not used in this example)


for-Pi-from-Nano_6_bytes_for_3_thermisters

// for-Pi-from-Nano_6_bytes_for_3_thermisters (for Pi code - Pi-Ard_send_3_bytes_get_6_from_Nano)
// Pi first argument defines the i2c address of the Arduino
// then a command number
// then 2 bytes to be combined into a 2 byte word
// then respond to the Pi commands and return three 2 byte numbers (0-65535) to the Pi - use for 3 thermisters in this test
// this program requires a request from the Pi - it is just a slave
// tested with i2c speed of 10,000 (slow for my long line)

#include <Wire.h>

#include <Adafruit_NeoPixel.h>
#define PIN 8
Adafruit_NeoPixel strip = Adafruit_NeoPixel(8, PIN, NEO_GRB + NEO_KHZ800);

#define SLAVE_ADDRESS 0x04

int number = 0;
int command = 0;
int data[8];
word combined = 0; //- - word or double needed here - int fails (why??)
int x = 0;
double arduino_temp;
word send_to_Pi = 0;
word send_to_Pi0 = 0;
word send_to_Pi1 = 0;
word send_to_Pi2 = 0;
int potPin = 2; // select the input pin for the potentiometer
int potval = 0; // variable to store the value coming from the sensor
float temp;
//word temp;

uint8_t templow;
uint8_t temphigh;


//**********************************************NTR
#include <math.h>

#define ThermistorPIN0 0
#define ThermistorPIN1 1
#define ThermistorPIN2 2
float pad = 9870; // balance/pad resistor value, set this to the measured resistance of the pad resistor
float thermr = 10000; // thermistor nominal resistance
//**********************************************

//=====================================================================setup START
void setup() {

strip.begin();// Initialize all the variables
strip.show(); // Initialize all pixels to 'off'

pinMode(13, OUTPUT); //to flash the on board LED

// initialize i2c as slave
Wire.begin(SLAVE_ADDRESS);

// define callbacks for i2c communication
Wire.onReceive(receiveData);
Wire.onRequest(sendData);
Serial.begin(9600); // open the serial port at 9600 bps - for testing
}
//=====================================================================setup END

//--------------------------------------------------------------------------------------------------------------loop START
void loop() {
if (x == 1){

potval = analogRead(potPin); // read the value from the potentiometer
Serial.print ("potentiometer sensorValue = ");
Serial.println (potval);
PrintOut ();

BarDisplay(combined);

//delay(1000);
arduino_temp = GetTemp();
//§§§§§§§§§§§§§§§§§§§§§§§§§§§§§§§§§§§§§§§§§§§§§§§§§§§§§§§§§§§§§§§§§ command 1 (read pot value)
if (command==1) {
Serial.print ("command byte 1 received-LED 1 pulse, send_to_Pi is ->");
Serial.println (send_to_Pi);
PrintOut ();
Flash_LED_13();
BarDisplay(combined);
}
//§§§§§§§§§§§§§§§§§§§§§§§§§§§§§§§§§§§§§§§§§§§§§§§§§§§§§§§§§§§§§§§§§ command 2 (read arduino internal temperature)
if (command==2) {
Serial.print ("command byte 2 received-LED 2 pulses, send_to_Pi (temperature) is ->");
Serial.println (send_to_Pi);

PrintOut ();

Flash_LED_13();
Flash_LED_13();
}
//§§§§§§§§§§§§§§§§§§§§§§§§§§§§§§§§§§§§§§§§§§§§§§§§§§§§§§§§§§§§§§§§§ command 3 (send thermistor temperature) - - - test with this one
if (command==3) {

temp=Thermistor(analogRead(ThermistorPIN0)); // read ADC and convert it to Celsius
Serial.print("Thermistor 0 ");
Serial.print(temp,1);
Serial.print(" degrees C ");
send_to_Pi0 = temp*10; //the thermistor temperature x 10
Serial.print ("send_to_Pi0 is Tx10->");
Serial.println (send_to_Pi0);

temp=Thermistor(analogRead(ThermistorPIN1)); // read ADC and convert it to Celsius
Serial.print("Thermistor 1 ");
Serial.print(temp,1);
Serial.print(" degrees C ");
send_to_Pi1 = temp*10; //the thermistor temperature x 10
Serial.print ("send_to_Pi1 is Tx10->");
Serial.println (send_to_Pi1);

temp=Thermistor(analogRead(ThermistorPIN2)); // read ADC and convert it to Celsius
Serial.print("Thermistor 2 ");
Serial.print(temp,1);
Serial.print(" degrees C ");
send_to_Pi2 = temp*10; //the thermistor temperature x 10
Serial.print ("send_to_Pi2 is Tx10->");
Serial.println (send_to_Pi2);

Serial.println ("");
//PrintOut ();
Flash_LED_13();
Flash_LED_13();
Flash_LED_13();
}
//§§§§§§§§§§§§§§§§§§§§§§§§§§§§§§§§§§§§§§§§§§§§§§§§§§§§§§§§§§§§§§§§§ end of commands

}
x = 0;
}
//-------------------------------------------------------------------------------------------------------------------loop END

//__________________________________________________________________________________________ receive data START - not needed for thermistor test
// in this receiveData section just save data then work on them in main loop
void receiveData(int byteCount){
//get data from i2c
x=0;
while(Wire.available()) {
data[x] = Wire.read();
x++;
}

//++++++++++++++++++++++++++++++++++++++++++++++++++++++++++++++++ data[0]=1
if (data[0] == 1){
command = 1;
send_to_Pi = potval;
}
//++++++++++++++++++++++++++++++++++++++++++++++++++++++++++++++++ data[0]=2
if(data[0] == 2) {
command = 2;
send_to_Pi = (int)arduino_temp;
}
//+++++++++++++++++++++++++++++++++++++++++++++++++++++++++++++++++data[0]=3
if(data[0] == 3) {
command = 3;
}
//for more than 3 commands use 4, 5, 6 etc for the 2nd argument of the Pi code

// create the 2 byte word - there is time to do this here rather than many times in the loop
combined = data[1]; //send data[1] to right most 8 bits
combined = combined<<8; //shift data[1] over to left most 8 bits
combined |= data[2]; //logical OR keeps data[1] intact in combined and fills in right most 8 bits
x=1;
}
//____________________________________________________________________________________________ receive data from Pi END

//___________________________________________________________________________________________ send data to Pi START
void sendData(){
// enter as byte test[] = {high,low,high,low} to send 2 2 byte numbers (255 255 gives 65535)
// Pi can use int to see contain this, Arduino needs word, not int, for 2 bytes (why??)

byte test[] = {highByte(send_to_Pi0),lowByte(send_to_Pi0),highByte(send_to_Pi1),lowByte(send_to_Pi1),highByte(send_to_Pi2),lowByte(send_to_Pi2)};

Wire.write(test,6);
}
//________________________________________________________________________________________________ send data to Pi END

//======================================================================================================= functions below this line

// >>>>>>>>>>>>>>>>>>>>>>>>>>>>>>>>>>>>>>>>>>>>>>>>>>>>>>>>>>>>>>>>>>>>>>>>>>>>> FUNCTION Get Arduino temperature
// Get the internal temperature of the Arduino
double GetTemp(void)
{
unsigned int wADC;
double t;
ADMUX = (_BV(REFS1) | _BV(REFS0) | _BV(MUX3));
ADCSRA |= _BV(ADEN); // enable the ADC
delay(20); // wait for voltages to become stable.
ADCSRA |= _BV(ADSC); // Start the ADC
while (bit_is_set(ADCSRA,ADSC));
wADC = ADCW;
t = (wADC - 324.31 ) / 1.22;
return (t);
}
// >>>>>>>>>>>>>>>>>>>>>>>>>>>>>>>>>>>>>>>>>>>>>>>>>>>>>>>>>>>>>>>>>>>>>>>>>>>> FUNCTION PrintOut data - hold for later test
void PrintOut(){
Serial.print ("data[0] - command byte = ");
Serial.println (data[0]); // the high byte of the 16 bit 1nt
Serial.print ("data[1] - 2nd byte received = ");
Serial.println (data[1]); // the low byte of the 16 bit int
Serial.print ("data[2] - 3rd byte received = ");
Serial.println (data[2]); // the low byte of the 16 bit int
combined = data[1]; //send data[1] to right most 8 bits
combined = combined<<8; //shift data[1] over to left most 8 bits
combined |= data[2]; //logical OR keeps data[1] intact in combined and fills in right most 8 bits
Serial.print ("data[1] (high byte) and data[2] (low byte) combined into 2byte arduino word = ");
Serial.println (combined);
Serial.println ("");

delay (1000);
}

// >>>>>>>>>>>>>>>>>>>>>>>>>>>>>>>>>>>>>>>>>>>>>>>>>>>>>>>>>>>>>>>>>>>>>>>>>>>>>> FUNCTION Flash_LED_13
void Flash_LED_13(){
digitalWrite(13, HIGH); // set the LED on
delay(300);
digitalWrite(13, LOW); // set the LED off
delay(300);
}

// >>>>>>>>>>>>>>>>>>>>>>>>>>>>>>>>>>>>>>>>>>>>>>>>>>>>>>>>>>>>>>>>>>>>>>>>>>>>>> FUNCTION DRIVE NeoPixel LED Strip
// function to create bar of LEDs depending on value of 2 byte variable "combined" above
// color values chosen for even brightness
void BarDisplay(int x) {
// set all leds to go off unless state changed below
for (int i=0; i <= 7; i++){strip.setPixelColor(i, strip.Color(0, 0, 0));}
if (x >= 113) { strip.setPixelColor(0, strip.Color(30, 30, 30));} // white
if (x >= 227) { strip.setPixelColor(1, strip.Color(30, 30, 30));} // white
if (x > 340 && x <= 454)
{for (int i=0; i <= 2; i++){strip.setPixelColor(i, strip.Color(0, 60, 0));}} // green}
if (x > 454 && x<= 568)
{for (int i=0; i <= 3; i++){strip.setPixelColor(i, strip.Color(0, 60, 0));}} // green}
if (x > 568 && x<= 682)
{for (int i=0; i <= 4; i++){strip.setPixelColor(i, strip.Color(0, 0, 60));}} // blue
if (x > 682 && x<= 796)
{for (int i=0; i <= 5; i++){strip.setPixelColor(i, strip.Color(0, 0, 60));}} // blue
if (x > 796 && x<= 911)
{for (int i=0; i <= 6; i++){strip.setPixelColor(i, strip.Color(40, 0, 0));}} // red
if (x > 911)
{for (int i=0; i <= 7; i++){strip.setPixelColor(i, strip.Color(40, 0, 0));}} // red
strip.show();
}
// note - 8 steps as gaps between these numbers -0 113 227 340 454 568 682 796 911 1024

// >>>>>>>>>>>>>>>>>>>>>>>>>>>>>>>>>>>>>>>>>>>>>>>>>>>>>>>>>>>>>>>>>>>>>>>>>>>>>>FUNCTION thermistor calculation function

float Thermistor(int RawADC) {
long Resistance;
float Temp; // Dual-Purpose variable to save space.
Resistance=pad*((1024.0 / RawADC) - 1);
Temp = log(Resistance); // Saving the Log(resistance) so not to calculate it 4 times later
Temp = 1 / (0.001129148 + (0.000234125 * Temp) + (0.0000000876741 * Temp * Temp * Temp));
Temp = Temp - 273.15; // Convert Kelvin to Celsius
return Temp; // Return the Temperature
}
// >>>>>>>>>>>>>>>>>>>>>>>>>>>>>>>>>>>>>>>>>>>>>>>>>>>>>>>>>>>>>>>>>>>>>>>>>>>>>>>>>>

Raspberry Pi code (i2c master) - grab thermistor data from Nano (i2c address 4) and save to Raspberry Pi ramdisk

Pi-Ard_send_3_bytes_get_6_from_Nano.c

// /home/graham/UTFT_display/Pi-Ard_send_3_bytes_get_6_from_Nano.c

// general purpose arduino i2c driver - send 2 bytes - first is a command
// receive 6 bytes from the Arduino Nano and combine into 3 2-byte numbers (0-65535)
// use with Arduino code Pi-Ard_2_bytes_both_ways-pot-led-thermister_4
// (for testing read temperatures from 3 thermisters and display on the Mega LCD)
// to compile use gcc Pi-Ard_send_3_bytes_get_6_from_Nano.c -o Pi-Ard_send_3_bytes_get_6_from_Nano

// use like /home/graham/Pi-Ard_send_3_bytes_get_6_from_Nano 4 3 255 255 (for i2c address 4 command 3)

#include <string.h>
#include <unistd.h>
#include <errno.h>
#include <stdio.h>
#include <stdlib.h>
#include <linux/i2c-dev.h>
#include <sys/ioctl.h>
#include <fcntl.h>
#include <unistd.h>

int i2c;
int rc;
unsigned char data[7]; // the received byte store
unsigned long address; // the i2c bus address of the Arduino
int combined1;
int combined2;
int combined3;

int main(int argc, char *argv[])
{

// check for correct input structure
if (argc != 5) {
/* error if we are not getting just 4 inputs after the program name */
fprintf(stderr, "usage: %s <address> <command_byte> <high_byte> <low_byte>\n",argv[0]);
exit(1);
}

// --------------------------------------------------------the arduino i2c address
/* address is the first number after the program name */
address = atoi(argv[1]);
printf("address = %d\n", address);

// ----------------------------------------------------------the command byte
/* the second byte to send out to the arduino is the second number
place it into the first element of the data array - the command byte */
data[0] = atoi(argv[2]);
printf("command = %d\n", data[0]);

// ----------------------------------------------------------the two data bytes <- not needed on the Nano yet
/* the third byte to send out to the arduino is the third number
place it into the second element of the data array */
data[1] = atoi(argv[3]);
printf("data[1] = %d\n", data[1]);

/* the forth byte to send out to the arduino is the forth number
place it into the second element of the data array */
data[2] = atoi(argv[4]);
printf("data[2] = %d\n", data[2]);
// ----------------------------------------------------------------------------WRITE

printf("I2C: Connecting\n");

// use /dev/i2c-0 for Pi model B, /dev/i2c-0 for B+ and 2
i2c = open("/dev/i2c-1",O_RDWR); /* open the device dev/i2c-1 */

printf("I2C: acquiring i2c address 0x%x\n", address);

rc=ioctl(i2c,I2C_SLAVE,address); /* set the i2c chip address */

unsigned char cmd[16];

printf("Sending command - data[0] %d\n", data[0]);
printf("Sending byte - data[1] %d\n", data[1]);
printf("Sending byte - data[2] %d\n", data[2]);

write(i2c, data, 3);

//-------------------------------------------------------------------------------READ
// As we are not talking to direct hardware but a micro controller we
// need to wait a short while so that it can respond.
// 1ms seems to be enough but it depends on what workload it has
usleep(10000);

char buf[6];
read(i2c, buf, 6);
int from_arduino0 = (int) buf[0]; // high byte
int from_arduino1 = (int) buf[1]; // low byte
int from_arduino2 = (int) buf[2]; // high byte
int from_arduino3 = (int) buf[3]; // low byte
int from_arduino4 = (int) buf[4]; // high byte
int from_arduino5 = (int) buf[5]; // low byte
printf("byte_from_arduino_0 = %d\n", from_arduino0);
printf("byte_from_arduino_1 = %d\n", from_arduino1);
printf("byte_from_arduino_2 = %d\n", from_arduino2);
printf("byte_from_arduino_3 = %d\n", from_arduino3);
printf("byte_from_arduino_4 = %d\n", from_arduino4);
printf("byte_from_arduino_5 = %d\n", from_arduino5);

combined1 = from_arduino0;
combined1 = combined1<<8;
combined1 |= from_arduino1;

combined2 = from_arduino2;
combined2 = combined2<<8;
combined2 |= from_arduino3;

combined3 = from_arduino4;
combined3 = combined3<<8;
combined3 |= from_arduino5;

printf("combine arduino0 and arduino1 into 2 byte number = %d\n", combined1);
printf("combine arduino2 and arduino3 into 2 byte number = %d\n", combined2);
printf("combine arduino4 and arduino5 into 2 byte number = %d\n", combined3);

// make Arduino derived data available for Blassic basic master programs
//save from_arduino1 to ramdisk
FILE *f;
f = fopen("/var/www/ramdisk/from_arduino0.dat","w");
fprintf(f, "%d", from_arduino0);
fclose(f);

//save to ramdisk
f = fopen("/var/www/ramdisk/from_arduino1.dat","w");
fprintf(f, "%d", from_arduino1);
fclose(f);

f = fopen("/var/www/ramdisk/from_arduino2.dat","w");
fprintf(f, "%d", from_arduino2);
fclose(f);

f = fopen("/var/www/ramdisk/from_arduino3.dat","w");
fprintf(f, "%d", from_arduino3);
fclose(f);

f = fopen("/var/www/ramdisk/from_arduino4.dat","w");
fprintf(f, "%d", from_arduino4);
fclose(f);

f = fopen("/var/www/ramdisk/from_arduino5.dat","w");
fprintf(f, "%d", from_arduino5);
fclose(f);

//save 2BytesCombined1 to ramdisk
f = fopen("/var/www/ramdisk/2BytesCombined1.dat","w");
fprintf(f, "%d", combined1);
fclose(f);

//save 2BytesCombined2 to ramdisk
f = fopen("/var/www/ramdisk/2BytesCombined2.dat","w");
fprintf(f, "%d", combined2);
fclose(f);

//save 2BytesCombined3 to ramdisk
f = fopen("/var/www/ramdisk/2BytesCombined3.dat","w");
fprintf(f, "%d", combined3);
fclose(f);

// Now wait else you could crash the arduino by sending requests too fast (not tested)
usleep(10000);

close(i2c);
return(0);
}

Raspberry Pi code (i2c master) - send the stored thermistor data to the Arduino Mega (i2c address 5)

Pi-Ard_send_7_bytes_to_MegaLCD_get_4-a.c

// /home/graham/UTFT_display/Pi-Ard_send_7_bytes_to_MegaLCD_get_4-a.c

// general purpose arduino i2c driver - send 7 bytes - first is a command then 3 pairs to build 2 2-byte numbers
// receive 2 bytes from the Arduino and combine into a 2 byte number (0-65535)
// use with Arduino code MegaSlaveLcd6-2ThermistersOK to provide data for the screen
// to compile use gcc Pi-Ard_send_7_bytes_to_MegaLCD_get_4-a.c -o Pi-Ard_send_7_bytes_to_MegaLCD_get_4-a

// use like /home/graham/UTFT_display/Pi-Ard_send_7_bytes_to_MegaLCD_get_4-a 5 1 123 0 234 0 222 0 (for i2c address 4 - command 2 - then 6 bytes for 3 2-byte numbers)

#include <string.h>
#include <unistd.h>
#include <errno.h>
#include <stdio.h>
#include <stdlib.h>
#include <linux/i2c-dev.h>
#include <sys/ioctl.h>
#include <fcntl.h>
#include <unistd.h>

int i2c;
int rc;
unsigned char data[11]; // the received byte store
unsigned long address; // the i2c bus address of the Arduino
int combined1;
int combined2;

int main(int argc, char *argv[])
{

// check for correct input structure
if (argc != 9) {
/* error if we are not getting just 8 inputs after the program name */
fprintf(stderr, "usage: %s <address> <command_byte> <high_byte_data-1> <low_byte_data-2> <high_byte_data-3> <low_byte_data-4> <high_byte_data-5> <low_byte_data-6>\n",argv[0]);
exit(1);
}

// --------------------------------------------------------the arduino i2c address
/* address is the first number after the program name */
address = atoi(argv[1]);
printf("address = %d\n", address);

// ----------------------------------------------------------the command byte
/* the second byte to send out to the arduino is the second number
place it into the first element of the data array - the command byte */
data[0] = atoi(argv[2]);
printf("command = %d\n", data[0]);

// ----------------------------------------------------------the six data bytes
data[1] = atoi(argv[3]);
printf("data[1] = %d\n", data[1]);

data[2] = atoi(argv[4]);
printf("data[2] = %d\n", data[2]);

data[3] = atoi(argv[5]);
printf("data[3] = %d\n", data[3]);

data[4] = atoi(argv[6]);
printf("data[4] = %d\n", data[4]);

data[5] = atoi(argv[7]);
printf("data[5] = %d\n", data[5]);

data[6] = atoi(argv[8]);
printf("data[6] = %d\n", data[6]);
// ----------------------------------------------------------------------------

printf("I2C: Connecting\n");

// use /dev/i2c-0 for Pi model B, /dev/i2c-1 for B+ and 2
i2c = open("/dev/i2c-1",O_RDWR); /* open the device dev/i2c-1 */

printf("I2C: acquiring i2c address 0x%x\n", address);

rc=ioctl(i2c,I2C_SLAVE,address); /* set the i2c chip address */

write(i2c, data, 7); //send 7 bytes on the i2c bus

// As we are not talking to direct hardware but a micro controller we
// need to wait a short while so that it can respond.
//
// 1ms seems to be enough but it depends on what workload it has
usleep(10000);

/* ----------------------------------- nothing to receive from the mega lcd display - use later?
char buf[4];
read(i2c, buf, 4);
int from_arduino0 = (int) buf[0]; // high byte
int from_arduino1 = (int) buf[1]; // low byte
int from_arduino2 = (int) buf[2]; // high byte
int from_arduino3 = (int) buf[3]; // low byte
printf("byte_from_arduino_0 = %d\n", from_arduino0);
printf("byte_from_arduino_1 = %d\n", from_arduino1);
printf("byte_from_arduino_2 = %d\n", from_arduino2);
printf("byte_from_arduino_3 = %d\n", from_arduino3);

combined1 = from_arduino0; //send data[1] to right most 8 bits
combined1 = combined1<<8; //shift data[1] over to left most 8 bits
combined1 |= from_arduino1; //logical OR keeps data[1] intact in combined and fills in right most 8 bits

combined2 = from_arduino2; //send data[1] to right most 8 bits
combined2 = combined2<<8; //shift data[1] over to left most 8 bits
combined2 |= from_arduino3; //logical OR keeps data[1] intact in combined and fills in right most 8 bits

printf("combine1 - arduino0 and arduino1 into 2 byte number = %d\n", combined1);
printf("combine2 - arduino2 and arduino3 into 2 byte number = %d\n", combined2);

// make Arduino derived data available for Blassic basic master programs
//save from_arduino1 to ramdisk
FILE *f;
f = fopen("/var/www/ramdisk/from_arduino0.dat","w");
fprintf(f, "%d", from_arduino0);
fclose(f);

//save from_arduino2 to ramdisk
f = fopen("/var/www/ramdisk/from_arduino1.dat","w");
fprintf(f, "%d", from_arduino1);
fclose(f);

f = fopen("/var/www/ramdisk/from_arduino2.dat","w");
fprintf(f, "%d", from_arduino2);
fclose(f);

//save from_arduino2 to ramdisk
f = fopen("/var/www/ramdisk/from_arduino3.dat","w");
fprintf(f, "%d", from_arduino3);
fclose(f);

//save 2BytesCombined1 to ramdisk
f = fopen("/var/www/ramdisk/2BytesCombined1.dat","w");
fprintf(f, "%d", combined1);
fclose(f);

//save 2BytesCombined2 to ramdisk
f = fopen("/var/www/ramdisk/2BytesCombined2.dat","w");
fprintf(f, "%d", combined2);
fclose(f);
*/
// Now wait else you could crash the arduino by sending requests too fast (not tested)
usleep(10000);

close(i2c);
return(0);
}

Arduino Mega code (i2c slave)
- receive data from Pi and show on attached UTFT TFT liquid crystal display

MegSlaveLcd-3Thermisters-1 - - - - - EDIT 15/1/16

// MegSlaveLcd-3Thermisters-1 - - - - WORKS! 15/1/16
// drive the LCD colour display
//data 2 and 4and 6 are high bytes

// Pi first argument defines the i2c address of this Arduino - - - created 11/1/16
// then a command number to choose which part of the program runs
// then 2 bytes to be combined into a 2 byte word
// then 2 more
// then 2 more
// then respond to the Pi commands and return a 2 byte number (0-65535) to the Pi (not yet used for the Mega + LCD)
// this program requires a request from the Pi - it is just a slave
// tested with i2c speed of 10,000 (slow for my long line)
// home/graham/UTFT_display/Pi-Ard_send_7_bytes_to_MegaLCD_get_4-a 5 1 0 1 0 1 0 1 gives 25.6 and 25.6 degrees and 25.6 degrees

#include <Wire.h>

#include <UTFT.h>
// - - - - - - - - - - - - - - - - - - - - - - -load some fonts
// extern uint8_t SmallFont[];
// extern uint8_t BigFont[];
extern uint8_t GroteskBold24x48[];
UTFT myGLCD(CTE32HR,38,39,40,41); // for my particular board

#define SLAVE_ADDRESS 0x05

int number = 0;
int command = 0;
char data[10];
word combined1 = 0; //- - word or double needed here - int fails (why??)
word combined2 = 0;
word combined3 = 0;
int x;
int s = 0;
double temp;
word send_to_Pi = 0;
float temp0x10;
float temperature0;
float temp1x10;
float temperature1;
float temp2x10;
float temperature2;

//=====================================================================setup START
void setup() {

myGLCD.InitLCD();
myGLCD.clrScr();
pinMode(13, OUTPUT);

// initialize i2c as slave
Wire.begin(SLAVE_ADDRESS);

// define callbacks for i2c communication
Wire.onReceive(receiveData);
Wire.onRequest(sendData);
Serial.begin(9600); // open the serial port at 9600 bps:
}
//=====================================================================setup END

//---------------------------------------------------------------------------------loop START
void loop() {
delay (700);
myGLCD.setBackColor(0, 0, 0);
myGLCD.setFont(GroteskBold24x48);

Flash_LED_13(); //show we are alive

if (command==1) { // 1 used in this test
Serial.println("command is 1 ");

//----------------------------------------------------------------------------drive the LCD
if (s == 1)
{
myGLCD.setColor(255, 255, 255);
}
else
{
myGLCD.setColor(255, 0, 0);
}

myGLCD.fillCircle(20,20,15);

myGLCD.setColor(255, 126, 120);
myGLCD.printNumF(temperature1, 1, 370, 0, '.', 3); // for floats 1 digit after decimal point
// reserve space for 3 digits
myGLCD.print("garden =",140,0); // for strings

myGLCD.setColor(0, 255, 0);
myGLCD.printNumF(temperature0, 1, 370, 50, '.', 3);
myGLCD.print("greenhouse_S =",LEFT,50);

myGLCD.setColor(190, 190, 255);
myGLCD.printNumF(temperature2, 1, 370, 100, '.', 3);
myGLCD.print("greenhouse_W =",LEFT,100);

delay (700);
myGLCD.setColor(0, 0, 255);
myGLCD.fillCircle(20,20,15);
}

if (command==2) {
Serial.print ("command byte 2 received, send_to_Pi is ->"); // - - - use later?
Serial.println (send_to_Pi);
}
s=0;
}
//--------------------------------------------------------------------------------------loop END


//______________________________________________________________________________________________ receive data START
// in this receiveData section just save data then work on them in main loop
void receiveData(int byteCount){ //the incoming i2c bytes interrupt the processor
//get data from i2c
x=0;
while(Wire.available()) {
data[x] = Wire.read(); // (any number of bytes can be received if data[] is made large enough to hold them)
x++;
}


// what is the command byte?
//++++++++++++++++++++++++++++++++++ data[0]=1 // use this for this test
if (data[0] == 1){
command = 1;
send_to_Pi = 11;
s=1; //flash the white circle in loop
}

//++++++++++++++++++++++++++++++++++ data[0]=2
if(data[0] == 2) {
command = 2;
send_to_Pi = 22;
}

//++++++++++++++++++++++++++++++++++ data[0]=3
if(data[0] == 3) {
command = 3;
send_to_Pi = 33;
}

combined1 = word(data[2],data[1]); //high-data[2] and low-data[1] bytes combine here
temp0x10 = combined1;
temperature0 = temp0x10/10;
temperature0 = temperature0 - (20 - temperature0) * 1.5/20;

combined2 = word(data[4],data[3]);
temp1x10 = combined2;
temperature1 = temp1x10/10;
temperature1 = temperature1 - (20 - temperature1) * 1.6/20;

combined3 = word(data[6],data[5]);
temp2x10 = combined3;
temperature2 = temp2x10/10;
temperature2 = temperature2 - (20 - temperature2) * 1.5/20;


//for more than 3 commands use 4, 5, 6 etc for the 2nd argument of the Pi code - process in loop
}
//__________________________________________________________________________________________ receive data from Pi END

//_________________________________________________________ send data to Pi START - not needed for Mega display yet
void sendData(){
// enter as byte test[] = {high,low} to send 2 byte number (255 255 gives 65535)
// Pi can use int to contain this, Arduino needs word, not int, for 2 bytes (why??)
byte test[] = {highByte(send_to_Pi),lowByte(send_to_Pi)};
Wire.write(test,2);
}
//________________________________________________________________________________________________ send data to Pi END

//=============================================================== functions below this line

// >>>>>>>>>>>>>>>>>>>>>>>>>>>>>>>>>>>>>>>>>>>>>>>>>>>>>>>>>>>>>> FUNCTION Flash_LED_13
void Flash_LED_13(){
digitalWrite(13, HIGH); // set the LED on
delay(300);
digitalWrite(13, LOW); // set the LED off
delay(300);
}

Blassic glue script

pi_drive_arduino__3_Thermisters1.bas

#!/usr/sbin/blassic

' /home/graham/UTFT_display/pi_drive_arduino__3_Thermisters1.bas

'data 2 and 4 and 6 are high bytes
'home/graham/UTFT_display/Pi-Ard_send_7_bytes_to_MegaLCD_get_4-a 5 1 0 1 0 1 0 1 gives 25.6 and 25.6 degrees and 25.6 degrees

'address 4 for 3 thermisters on Nano
'address 5 for Mega with LCD shield

LABEL StartAgain

thermister_C_driver$ = "/home/graham/UTFT_display/Pi-Ard_send_3_bytes_get_6_from_Nano 4 3 255 255"
'PRINT thermister_C_driver$
SHELL thermister_C_driver$

PAUSE 4000

OPEN "/var/www/ramdisk/from_arduino0.dat" FOR INPUT AS #1:INPUT #1,arduino_byte_0$:CLOSE #1
OPEN "/var/www/ramdisk/from_arduino1.dat" FOR INPUT AS #1:INPUT #1,arduino_byte_1$:CLOSE #1
OPEN "/var/www/ramdisk/from_arduino2.dat" FOR INPUT AS #1:INPUT #1,arduino_byte_2$:CLOSE #1
OPEN "/var/www/ramdisk/from_arduino3.dat" FOR INPUT AS #1:INPUT #1,arduino_byte_3$:CLOSE #1
OPEN "/var/www/ramdisk/from_arduino4.dat" FOR INPUT AS #1:INPUT #1,arduino_byte_4$:CLOSE #1
OPEN "/var/www/ramdisk/from_arduino5.dat" FOR INPUT AS #1:INPUT #1,arduino_byte_5$:CLOSE #1

PRINT "arduino_byte_0$ for screen = ",arduino_byte_0$
PRINT "arduino_byte_1$ for screen = ",arduino_byte_1$
PRINT "arduino_byte_2$ for screen = ",arduino_byte_2$
PRINT "arduino_byte_3$ for screen = ",arduino_byte_3$
PRINT "arduino_byte_4$ for screen = ",arduino_byte_4$
PRINT "arduino_byte_5$ for screen = ",arduino_byte_5$

screen_C_driver$ = "/home/graham/UTFT_display/Pi-Ard_send_7_bytes_to_MegaLCD_get_4-a 5 1 " + arduino_byte_1$ + " " + arduino_byte_0$+ " " + arduino_byte_3$+ " " + arduino_byte_2$+ " " + arduino_byte_5$+ " " + arduino_byte_4$
SHELL screen_C_driver$

GOTO StartAgain

SYSTEM

The display looks a bit like -

. . . . . . garden = 19.0
greenhouse_S = 20.3
greenhouse_W = 19.4


Plus a flashing circle (topleft) to show it is alive

This is my first test with thermisters. (eBay low cost 10k ohm types)
A small series potentiometer in series with the pad resistor lets you tweak the value (total resistance close to 10 k ohm)
My 3 thermisters then all read the same to 0.1 degrees C when tied together.
(Used for greenhouse, hot-box and outdoor temperature reporting to the house)
They seem to work well on long lines (I use screened cable with 100nf capacitor across the line input)

Many thanks to all who publish open source code now woven into my code above!

The thermistor code from here gives good results at 20 degrees C
- but with all 3 probes in ice water I get 1.6 degrees

- Quick fix - add lines like -
temperature1 = temperature1 - (20 - temperature1) * 1.6/20;

(it is important to report freezing point accurately in a greenhouse)

. . . . .or go to LM75 i2c chips? . . . . .


Please email me if you want to swap notes

SUNSPOT HOME