index

Debian Slug Notes
some more notes for my bad memory for when I have to do it all over again
I have come back from OpenWrt to Debian.
I wanted a silent slug and thought that OpenWrt might be good without a swap drive and thus I could use a USB Flash memory stick.
I soon found I had run out of memory.
So these are my notes aimed at running Debian on a Flash drive but with as few writes to swap as posssible.

I used QTParted on Fedora to create sda1 as swap and sda2 as ext3 on a 2GByte SanDisk memory stick

Many thanks to -
http://nslu2.pcprobleemloos.nl/doku.php

http://n0tablog.wordpress.com/howtos/configuring-debian-etch-on-slug-nslu2/


# /etc/fstab: static file system information.
#
# <file system> <mount point> <type> <options> <dump> <pass>
proc /proc proc defaults 0 0
/dev/sda2 / ext3 defaults,errors=remount-ro,noatime 0 1
/dev/sda1 none swap sw 0 0
/dev/sda1 /media/usb0 auto rw,user,noauto,noatime 0 0
/dev/sda2 /media/usb1 auto rw,user,noauto,noatime 0 0

touch /.ext3flash

echo "0" > /proc/sys/vm/swappiness


:Disable 'MARK' messages in /etc/default/syslogd options:
add -
SYSLOGD="-m 0"
- or "-m 1440" - for every 24 hours


Disable disk integrity checks.
Slug51local:~# /sbin/tune2fs -c 0 -i 0 /dev/sda2
tune2fs 1.40-WIP (14-Nov-2006)
Setting maximal mount count to -1
Setting interval between checks to 0 seconds


Speed Check
Slug51local:~# dd if=/dev/sda2 of=/dev/null bs=10000 count=10000
10000+0 records in
10000+0 records out
100000000 bytes (100 MB) copied, 9.12616 seconds, 11.0 MB/s


Save Memory Use

If you are not using IPv6, you can prevent the module from being automatically loaded by adding the line
blacklist ipv6
to /etc/modprobe.d/blacklist.
The same goes for any other kernel module which is automatically loaded which you know you won’t need

lsmod to see what is loaded
free to see memory use


apt-get remove NFS (and NetaTalk) - seems they were not present on mine


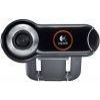
Using a high definition UVC Webcam with Debian

this link introduced me to the mjpg-streamer and the Quickcam Pro 9000.
That uses OpenWrt but I want to now use Debian - getting it to run was the biggest Linux challenge yet!

- also many thanks to the owner of http://www.botdream.com/blog/ for much advice

I took ages trying to find how to load "Video for Linux" or "V4L2" by "apt-get install"
- fear not ! - it is in the Kernel as installed.

When you plug the camera into the USB port the terminal (in ttyS0 by rs232) should report that a UVC camera has arrived.
So you need a driver

get the UVC driver for Quickcam pro 5000 and 9000
apt-get install subversion - so we can join the Linux Gods and work from the bleeding edge
svn checkout svn://svn.berlios.de/linux-uvc/linux-uvc/trunk
apt-get install debconf - it was already installed in mine - not sure why I need it....

BUT I eventually found lots of other things to do first before it would work
!!

from - http://openfacts.berlios.de/index-en.phtml?title=HowTo_compile_for_Ubuntu_6.06_LTS
apt-get install build-essential - that worked
apt-get install kernel-headers - OOPS! that one failed to so more Googling-
How to get kernel headers
from - http://www.cyberciti.biz/faq/howto-install-kernel-headers-package/
apt-get update - it did not work if I ignored this one
Install linux-header package -
apt-get install linux-headers-$(uname -r) - Oh I see!! - kernel-headers are really called linux-headers-$(uname -r) - obvious really......

So in the terminal I see -

Slug51local:~# modprobe usbvideo
Linux video capture interface: v2.00

But still no camera detected - Ahh! new magic word "insmod" needed -
You have to load the newly installed driver module uvcvideo.ko

cd /lib/modules/2.6.18-6-ixp4xx/usb/media
Slug51local:/lib/modules/2.6.18-6-ixp4xx/usb/media# insmod uvcvideo.ko

Now when you plug the camera in you see !!!-
usb 3-5: new high speed USB device using ehci_hcd and address 5
usb 3-5: configuration #1 chosen from 1 choice
uvcvideo: Found UVC 1.00 device <unnamed> (046d:08ce)
input: UVC Camera (046d:08ce) as /class/input/input3

Load and run mjpg-streamer - see the pictures in Firefox
This link helped a lot
http://mjpg-streamer.wiki.sourceforge.net/Usage
so do -

svn co https://mjpg-streamer.svn.sourceforge.net/svnroot/mjpg-streamer mjpg-streamer
(it says Checked out revision 69)

More preparation work needed!
apt-get install subversion build-essential libjpeg62-dev libjpeg62
try -
make clean all
OOPS!! - it needs the "convert" command
Google found http://www.debian-administration.org/articles/62
apt-get install imagemagick
make clean all
make DESTDIR=/usr install - now a very slow conversion of pictures (why?)- just wait!

now copy the contents of the www folder that come with the install to /webcam_www
and do -
mjpg_streamer -i "input_uvc.so -r 960x720" -o "output_http.so -p 8080 -w /webcam_www"
and in Firefox I then looked at 192.168.0.51:8080

And there it was at last - a beautiful picture of an untidy pile of cables on my bench!!!!

make things happen after boot
Debian startup scripts are more complex than OpenWrt!

In /etc/init.d I added a script (with actions at boot up but none at closedown) -

#! /bin/sh
#
# My startup script - webcam etc
# note -
# update-rc.d -f graham_startup.sh defaults 99
# update-rc.d -f graham_startup.sh remove
#

# Some things that run always
# <commands here>

# Carry out specific functions when asked to by the system
case "$1" in
start)
modprobe usbvideo
cd /lib/modules/2.6.18-6-ixp4xx/usb/media
insmod uvcvideo.ko
mjpg_streamer -i "input_uvc.so -r 960x720" -o "output_http.so -p 8080 -w /webcam_www"

;;
stop)
;;
*)
echo "Usage: /etc/init.d/graham_startup.sh {start|stop}"
exit 1
;;
esac

exit 0

and then, to make this the last script to run, did
update-rc.d -f graham_startup.sh defaults 99

modprobe usbvideo
cd /lib/modules/2.6.18-6-ixp4xx/usb/media
insmod uvcvideo.ko
-
loads the webcam driver

BUT

The problem I now have is that if I use -

mjpg_streamer -i "input_uvc.so -r 960x720" -o "output_http.so -p 8080 -w /webcam_www"

(either in the startup script above or in the command line of the ttyS0 terminal)
the terminal hangs even though I can see streaming pictures in Firefox and all other apps work OK.

Only if it was a manual command I can then issue a Control-C
and the mjpg-streamer stops and the terminal can be used again.

Thanks to NN for this -
"there is an option in mjpg-streamer to launch it in background, use it as a daemon:
[-b | --background]...: fork to the background, daemon mode"

So this lets me keep using the ttyS0 terminal -
mjpg_streamer -i "input_uvc.so -r 960x720" -b -o "output_http.so -p 8080 -w /webcam_www"

Note:- to make mjpg-streamer exit cleanly, use -
kill -9 `pidof mjpg_streamer`

Run two cameras
in
graham_startup.sh above replace
mjpg_streamer -i "input_uvc.so -r 960x720" -o "output_http.so -p 8080 -w /webcam_www"
with
if [ -e /dev/video1 ]; then
mjpg_streamer -b -i "input_uvc.so -d /dev/video0 -r 960x720" -o "output_http.so -p 8088 -w /webcam_www"
mjpg_streamer -b -i "input_uvc.so -d /dev/video1 -r 960x720" -o "output_http.so -p 8089 -w /webcam_www"
else
mjpg_streamer -b -i "input_uvc.so -d /dev/video0 -r 960x720" -o "output_http.so -p 8088 -w /webcam_www"
fi


Running "Motion" with a UVC Webcam with Debian (tested with Quickcam 5000)

I did apt-get install motion and loaded Motion and all the suggested sub packages
On the ttyS0 terminal I did -
motion -n
to run in terminal reporting mode


BUT THIS IS AN OLD VERSION

It ran with an old Quickcam 4000 that uses a built in driver that comes with Debian but it
gave errors if I used the Quickcam 5000 (even if that had a running UVC driver)

So I went to http://www.lavrsen.dk/twiki/bin/view/Motion/DownloadFiles
and downloaded motion-3.2.11.tar.gz
In the download directory I did

./configure
make
make install

Now it runs with the Quickcam 5000 !!

NB the 5000 has a screen of 640x480 pixels and this needs to be set for the webserver
in /usr/local/etc/motion.conf (this is a copy of the default motion-dist.conf)

Now to adjust many things in motion.conf - especially where it saves pictures and how often (turn your back for a moment and the disk is full!)


Adding a WIFI dongle


Objective
Make the Slug mobile and with the lowest possible WIFI power use

From eBay I bought a
D-Link DWL-G122 IEEE 802.11b/g USB 2.0 High Speed 2.4GHz Wireless Adapter
Hardware Ver. : C1 Firmware Ver. : 3.0

And then I followed most of the instructions here to compile the driver -
http://3lled.blogspot.com/2008/02/nslu2-dwl-g122-nas-with-wi-fi.html

Here is my backup copy of those instructions (in case the link dies) with my own mods (with many thanks)
1) Download and uncompress the driver's source code:
$ wget http://rt2x00.serialmonkey.com/rt73-cvs-daily.tar.gz
$ tar zxvf rt73-cvs-daily.tar.gz

2) Edit the Module/rtmp_init.c file to change the RTMPMoveMemory function body to only { memcpy(pDest, pSrc, Length); }
$ cd rt73-cvs-AAAAMMDDHH
$ vi Module/rtmp_init.c
// RTMPMoveMemory must change to:
VOID RTMPMoveMemory(
OUT PVOID pDest,
IN PVOID pSrc,
IN ULONG Length)
{
memcpy(pDest, pSrc, Length);
}

3) Compile the driver:
$ cd Module
$ make arm

4) Copy the resulting rt73.ko module to an appropriate place under /lib:
$ su
# mkdir -p /lib/modules/`uname -r`/kernel\
/drivers/net/wireless/rt2x00-legacy/
# cp rt73.ko /lib/modules/`uname -r`/kernel\
/drivers/net/wireless/rt2x00-legacy/

5) Copy the rt73.bin firmware to /lib/firmware:
# cp rt73.bin /lib/firmware

6) Update module dependencies:
# depmod

Before losing the working Ethernet connection you must get some tools "iwconfig", "iwlist", etc.
(that is the bit no-one tells novices about !)
apt-get install wireless-tools

7) Edit the /etc/network/interfaces file according to the configuration of the wireless network.
The alias for the DWL-G122 interface will be wlan0.
--my version--

/etc/network/interfaces
# This file describes the network interfaces available on your system
# and how to activate them. For more information, see interfaces(5).

# The loopback network interface
auto lo
iface lo inet loopback

# wifi D-Link DWL-G122
allow-hotplug wlan0
iface wlan0 inet static
pre-up ifconfig wlan0 up
pre-up iwconfig wlan0 mode Managed
pre-up iwconfig wlan0 essid "225"

# The primary network interface
# allow-hotplug eth0
# iface eth0 inet static

network 192.168.0.0
broadcast 192.168.0.255
address 192.168.0.51
netmask 255.255.255.0
gateway 192.168.0.230
# dns-* options are implemented by the resolvconf package, if installed
dns-nameservers 192.168.0.230
dns-search example.org


use the tools

Slug51local:~# iwlist wlan0 scan
wlan0 Scan completed :
Cell 01 - Address: 00:0C:41:17:FE:4B
ESSID:"225"
Mode:Managed
Channel:3
Encryption key:off
Bit Rates:130 Mb/s

now try to connect - - -

iwconfig wlan0 essid any
or
iwconfig wlan0 essid "225"

Slug51local:~# ping 192.168.0.50
PING 192.168.0.50 (192.168.0.50) 56(84) bytes of data.
64 bytes from 192.168.0.50: icmp_seq=1 ttl=64 time=18.5 ms

IT WORKS!!!

also see this


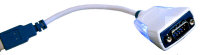
Adding a USB to rs232 converter serial port

It is not possible to use the second rs232 on the Slug CPU (it not fully wired and
there are no pins to solder to as on the Sweex router )
- so I bought a USB to serial converter from here

It uses a FTDI chip and Debian has the FTDI drivers built into the kernel.
It has blue diodes that flash on activity - useful to prove it is working.

When I plug it in I see
-

Slug51local:~# usb 1-2: new full speed USB device using ohci_hcd and address 5
usb 1-2: configuration #1 chosen from 1 choice
ftdi_sio 1-2:1.0: FTDI USB Serial Device converter detected
drivers/usb/serial/ftdi_sio.c: Detected FT232BM
usb 1-2: FTDI USB Serial Device converter now attached to ttyUSB0

So from the ttyS0 serial port or a ssh terminal you can write -

echo "hello slug">/dev/ttyUSB0

and see the output on the USB/rs232 converter output.
The default serial speed is 9600 Baud
but you can change it with stty -

Slug51local:~# stty -F /dev/ttyUSB0 115200

Confirm the setting -

Slug51local:~# stty -F /dev/ttyUSB0
speed 115200 baud; line = 0;
-brkint -imaxbel

For linking to an external device you need "raw" mode such that each character sent is immediately handled.
If you set "cooked" you only see the preceeding characters when a RETURN character is sent. In ttyS0 I set -

Slug51local:~# /dev/ttyUSB0 115200 raw
then
Slug51local:~# cat /dev/ttyUSB0
ght5ew


Where each of the characters above "ght5ew" that are entered into the USB/rs232 adapter on /dev/ttyUSB0
are processed by
the Slug one by one as they are typed.


Two GPIO lines for external equipment control?
Control two of the Slug LEDs - 1 for on, 0 for off - D9=disk2 - D10=disk1
echo 1 > /sys/class/leds/disk-1/brightness
echo 0 > /sys/class/leds/disk-1/brightness
echo 1 > /sys/class/leds/disk-2/brightness
echo 0 > /sys/class/leds/disk-2/brightness


Panic - My Debian Slug stopped booting at "Setting the system clock"
Fix - I removed the lithium battery cell for a few minutes - then when I typed "date" I saw the correct date and time - so it had restarted and reset OK.