1) General notes - this page
2) Using the generic board with the yellow jumpers
Experiments with the Arduno IDE connected to a generic ARM board
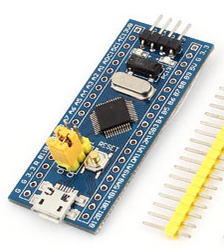
- containing an STM32F103C8T6
MENU
1) General notes - this page
2) Using the generic board with the yellow jumpers
3) Testing the Shenzhen generic board
4) Using Arduino_STM32 in Windows in a VMware image
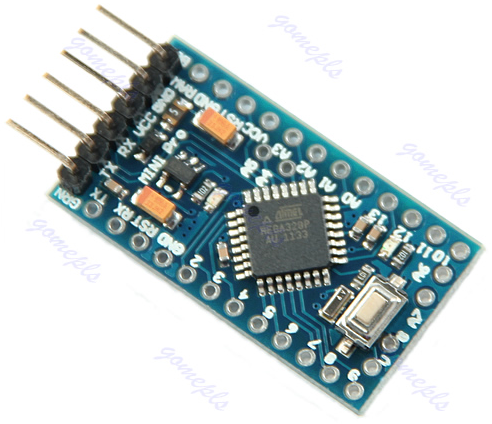
Arduino have an ARM chip in the Due but it is too large a board to embed into portable projects. I often use the tiny AVR based Pro Mini (less than £2 on eBay) |
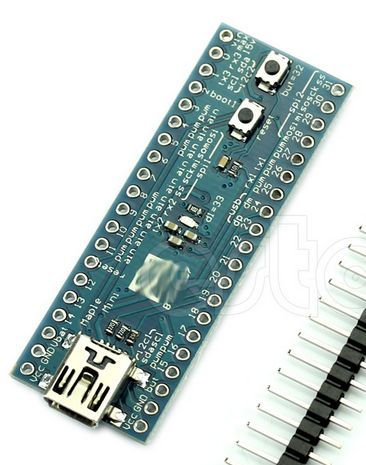
But for about £3 you can buy a generic STM32 board if similar size with lots more memory and speed - NB this is not a Maple Mini clone.
|
|
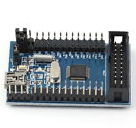
I aim to also test two other generic boards - these seem to bring out all the STM32 pins to headers
|
Compare
| Chip | ATmega328 (Uno etc) | STM32F103C8T6 (Arm as above) |
| Speed | 16MHz | 72MHz |
| Flash | 32 KB | 128 KB |
| RAM | 2 KB | 20 KB |
| Power | 5V (some have 3V option) | 3V |
|
Blink uses - Sketch uses 1,030 bytes (3%) of program storage space. Maximum is 32,256 bytes |
Ray Burnette's GLCD110_BMP085 uses - |
Search for "STM32F103C8T6" and "maple mini STM32" on eBay - the best deals are under £3.50 delivered
some genuine Maple Minis can be found for about £14 - they are no longer in production
- - - - (more later)
Developers on the Arduino Forum have managed to embed boards like this within the Arduno IDE
But if you are a novice like me do not bother the code gods - instead please enter a discussion here
See in particular the comments by Ray (mrburnette) on the first page.
I intend to follow Ray's Projects and his tested code examples
Roger Clark has published notes here
A Wiki has been built to summarise the contents of the forum posts
Data on the Maple Mini
Using iMac running Macintosh Mavericks 10.9.5 with Arduino 1.6.1
In order to insert the ARM software into the Arduino IDE you need to add files from the zip located here
Unfortunately the instructions on where to place the files for Mac OSX did not work for me.
I found it necessary open up the Arduino app (right click on the app to view the contents)
The files I needed for the Generic board are as shown below.
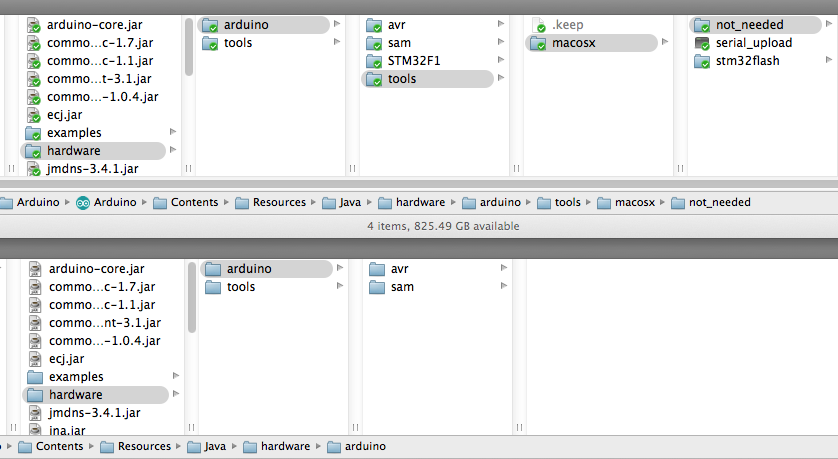
The examples are placed in the Arduino/Contents/Resources/Java/examples/ folder

NB! you do not need drivers since you program via the USART, not via the usb socket (use that for 5V power)
Using a USB to serial adapter connect
PA10 to TXD and PA9 to RXD (labeled A10 and A9 on the board)
For the generic board (with to 2 yellow connectors on the boot pins) select board type "STM32 to Flash - no bootloader"
(that means you do not have to load a special bootloader for the USB connector
- we use the one built into the chip ROM
linked to ports A9 and A10
)
I managed to download and run this Blink program
/* Blinks the built-in LED - modified by Sunspot to avoid confusion with the blink as delivered, Original ported to Maple from the Arduino example 27 May 2011 void setup() { void loop() { |
- and this, with "Hello World", proves that it can talk via the program pins -
void setup() Serial.begin(9600); void loop() |
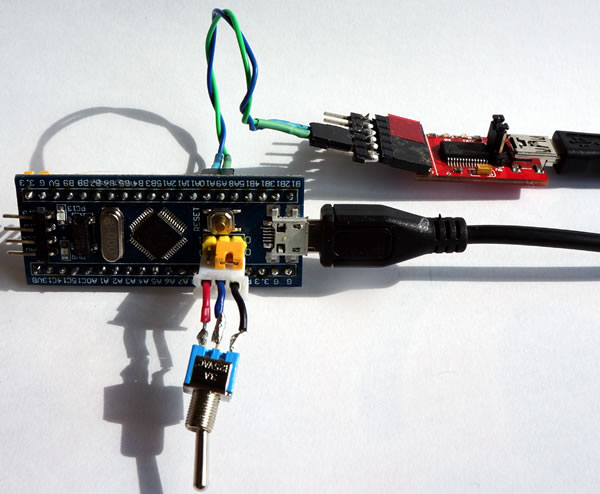
The USB to serial adapter has a swich to set the logic output to 3 volts - IMPORTANT
The blue switch replaces the BOOT 0 jumper and is shorting red and blue - this is in the program setting.
Press the RESET button then download from the Arduino IDE.
The blue LED will start to flash. Switch the switch to short blue and black to set normal play mode.
- - - - - - - - - Now to try and learn how much you can do with the board!
This is a first draft of the pages I hope to create for ARM Arduino users like me
who mainly code by -
Google- - - copy - - - paste - - - pray
Please email me if you want swap notes